🚀 Quick Start
The minimum steps to package this template with your own maps and logo.
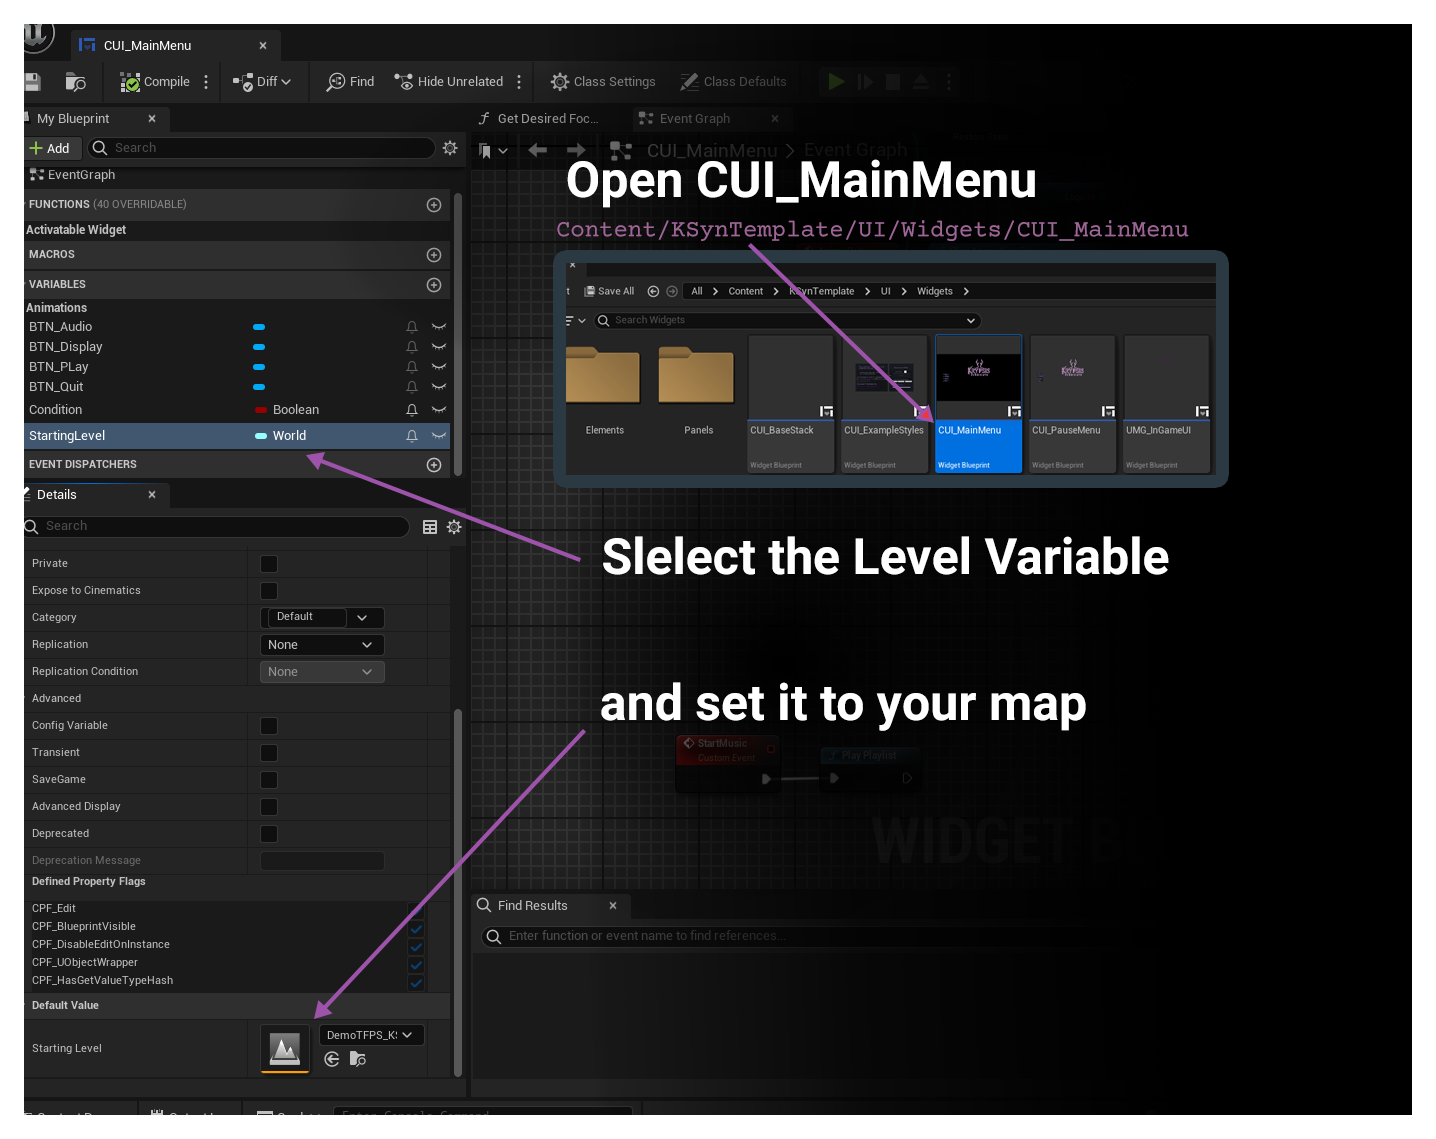
1. Point the Main Menu at Your Map
-
Open
Content/KSynTemplate/UI/Widgets/CUI_MainMenu. -
Go to Graph view (e.g.
LevelToLoadorGameMap). -
Set the
StartingLevelvariable to your gameplay map (e.g.Maps/MyGameMap). -
The main menu will now open your level instead of the demo map.
2. Swap the Main Menu Logo
-
Open
Content/KSynTemplate/UI/Widgets/CUI_MainMenu. -
In the hierarchy window the logo is located under
Overlay_LogoRoot. -
Replace these images with your own logo textures or update the textures in the material instances.
-
Anything placed under the
Overlay_LogoRootwidget will be animated in with the logo animation. -
Animation used:
Logo_In- Played forward when menu activates
- Reversed when menu deactivates
-
Change the logo in the Pause Menu widget the same way:
Content/KSynTemplate/UI/Widgets/CUI_PauseMenu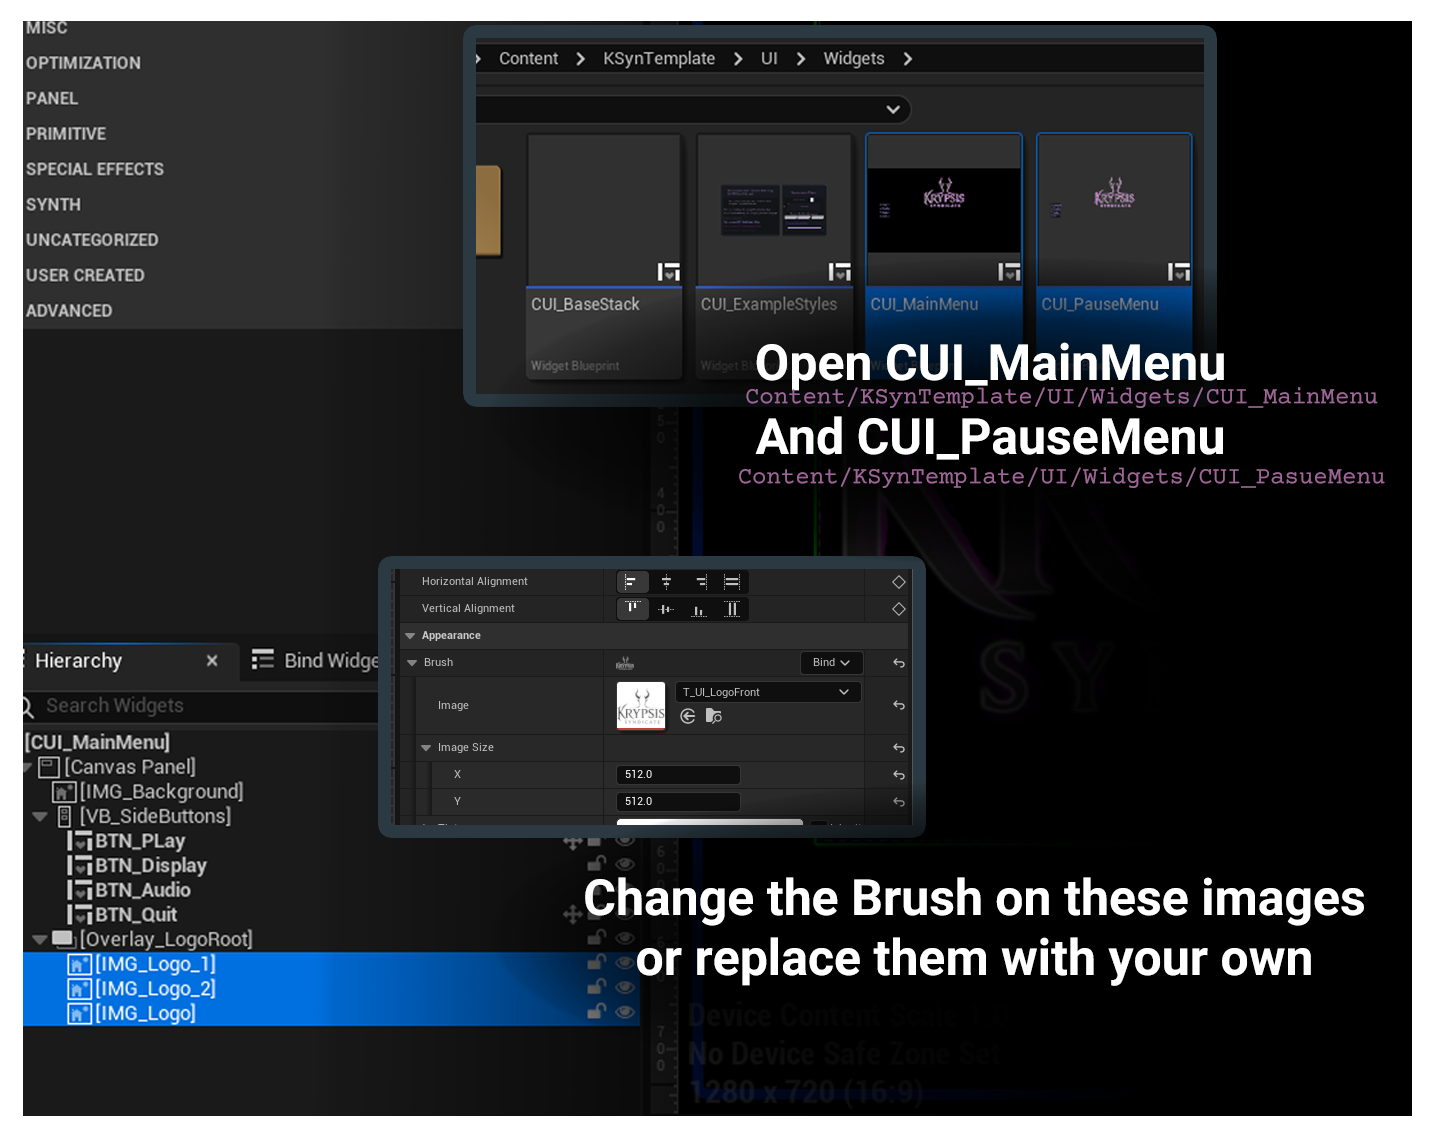
💡 Tip: Use a PNG with alpha for best results. In Texture settings, set TextureGroup = UI and Compression Settings = UserInterface2D (RGBA).
3. Update the List of Maps to Package
Project Settings → Project → Packaging
-
List of maps to include in a packaged build:
Remove/Game/KSynTemplate/Maps/DemoTFPS_KSynand add your level(s).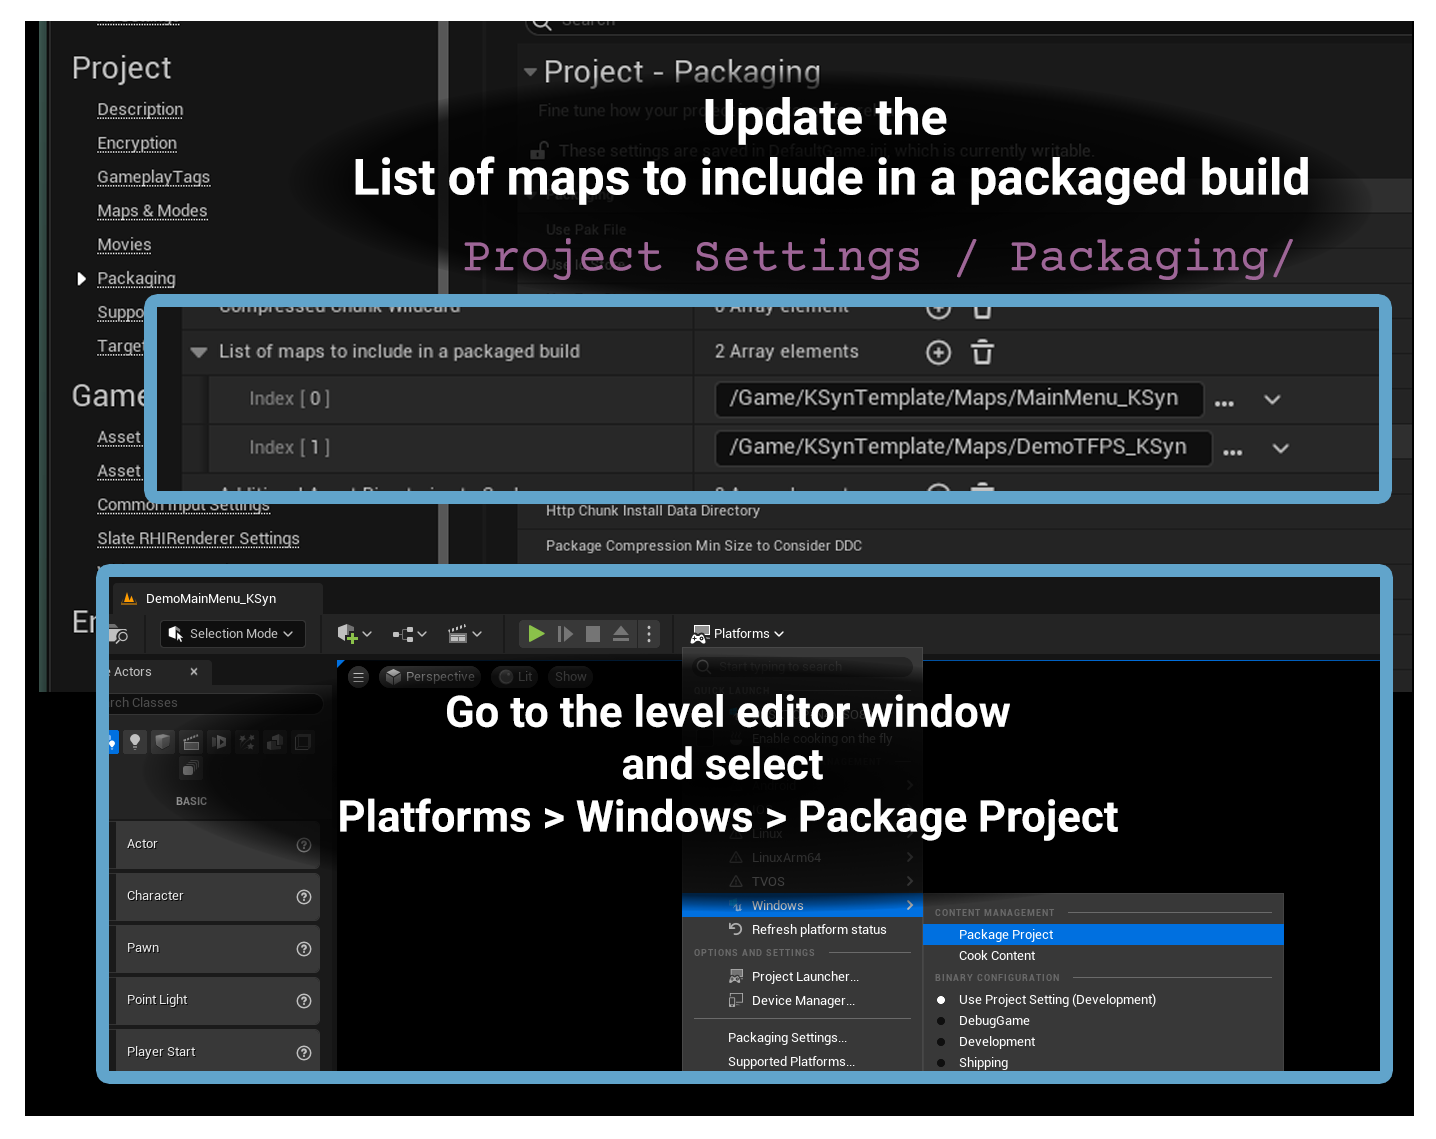
4. Package & Test
- In the level editor, select Platforms → Windows → Package Project.
- Run the packaged build:
- Main Menu shows your logo
- Play loads your gameplay map
- Esc / Start opens the Pause Menu
Common Issues
- Play button does nothing → Map variable isn’t set, or map not added to List of Maps to Package.
- Logo looks blurry or alpha missing → In Texture settings, set TextureGroup = UI, Compression Settings = UserInterface2D (RGBA)